


HOW TO:
Fit a C43 AMG front bumper skin to a W202
Fit & Connect the front fog lights.
Time taken:
2-3 Hours
Tools required:-13mm Socket, Small Philips screwdriver, Pliers, Electric Drill - another person for fitting it back on. & to make you food/drink as you go on.
Parts required:
C43 Front bumper & Connection kit/parts.
2x Front Foglights
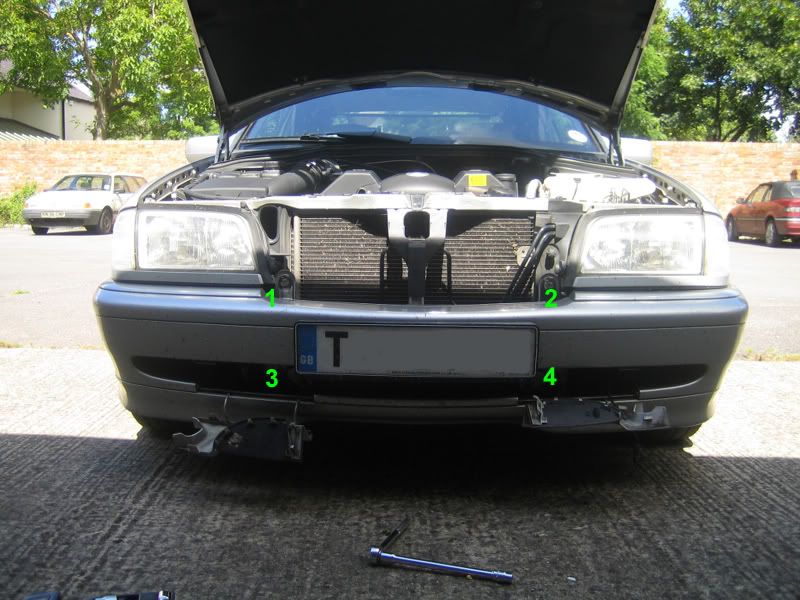
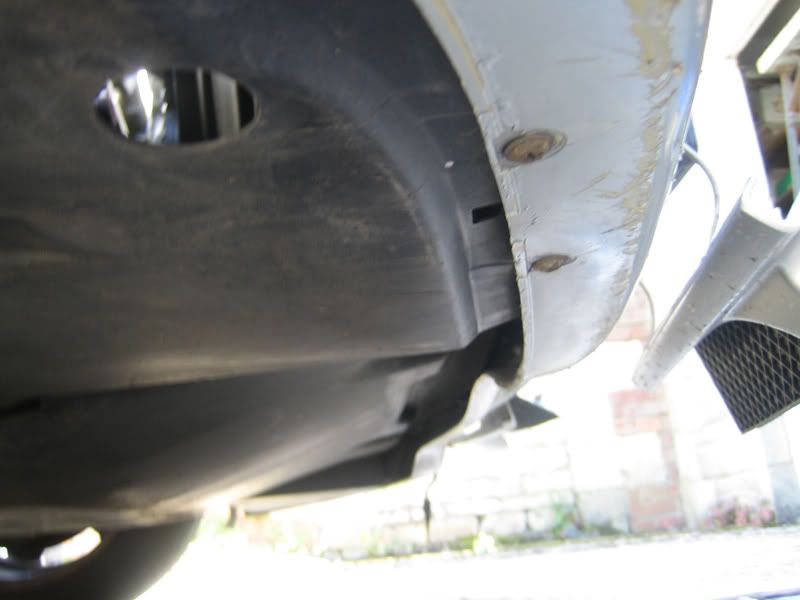
1. Start removing your existing front bumper by unscrewing the 4 main 13mm bolts located as follows:
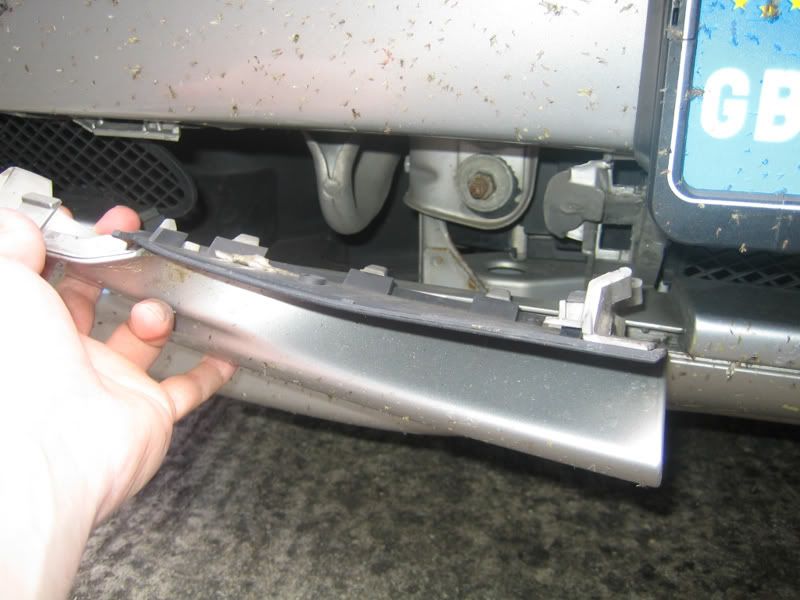
To gain access to the bottom 2, you will need to pull foward the bumper trim to expose the bolts.
2. With all 4 bolts removed (keep them safe!) and make your way to below the bumper, just infront of each wheel. You will spot 2x screws holding the mud guards in place. All 4 screws need to be removed.
3. Now pull back the mud guards over the bumper as shown below. This will make the removal alot easier.
4. Unclip the temp sensor from the front panel, it should just push through with a small amount of force.
5. Your now ready to remove the front bumper, ideally with the help of a friend - start at one corner and pull forwards.
It is normal to hear a loud scraping sound as the bumper is mounted on 'rail's'.
No doubt one side will give you grief so keep tugging until it is free.
Your old bumper is now off, place it down on a soft surface so that the corners arent scratched.
Id take this chance to give the newly exposed bodywork a clean as it will no doubt have 8+ years of dirt & possibly rust now visible.
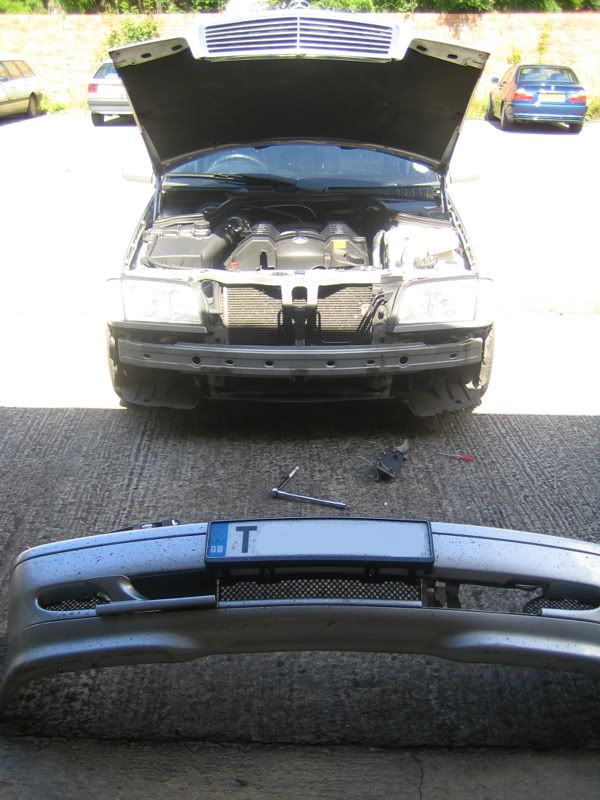
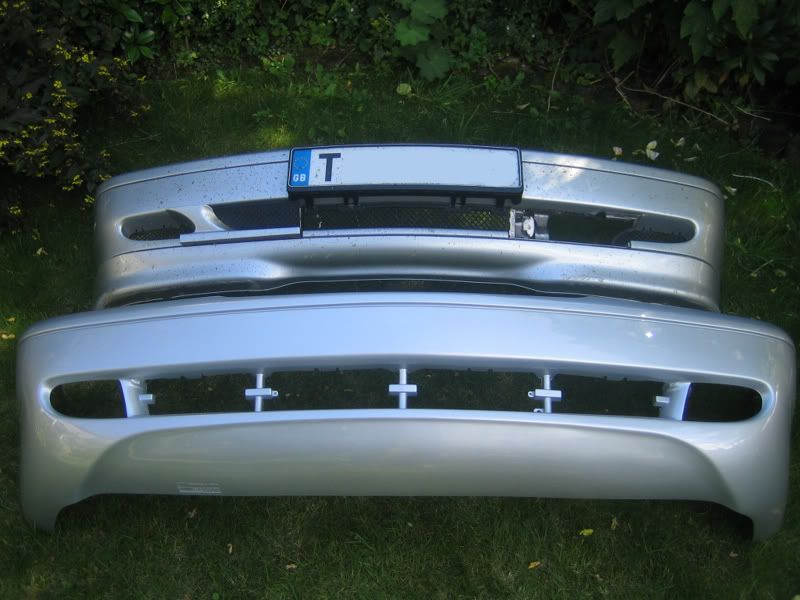
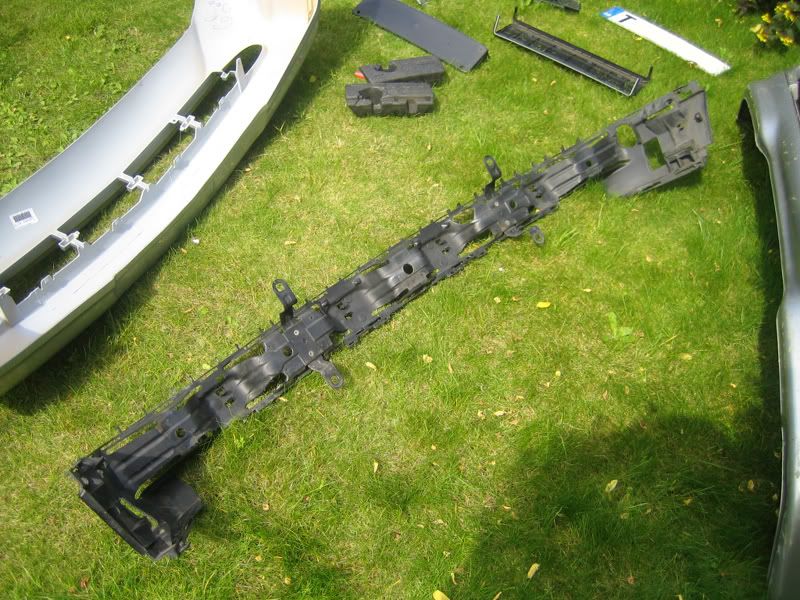
For those who are new to W202s, this is a good shot showning the differences in the standard facelift bumper agaist a C43 AMG bumper.
Removing & refitting the Bumper 'skeleton'
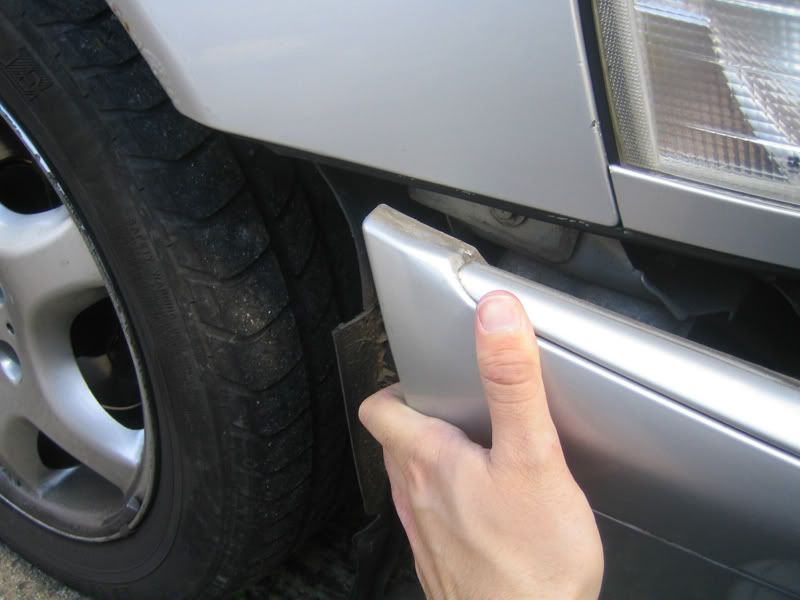
6. Now, this is the start of the tricky processes. From now on we are trying to remove the old bumper frame/skeleton from the inside or your old bumper, to do this you should 1st start with removing the numberplate plinth.
It is held on by 2x small screws, 1st remove them & keep them safe.
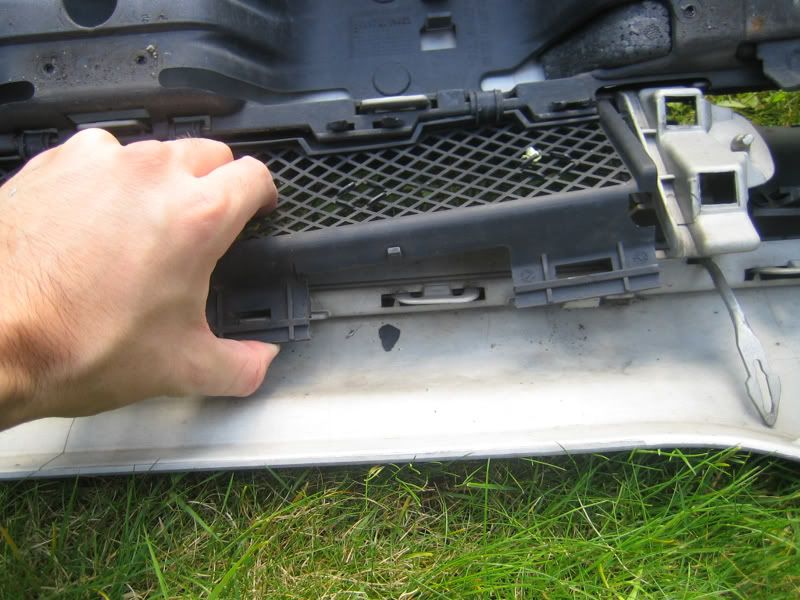
With the screws removed, you need to unclip the plinth by pulling the 4 clips free of the bumper (see pic) - be careful as its easy to break them!
7. You can now start on uncliping the bumper mesh trim, mine is a Sport so I have 3 lots to remove. Elegance models only have the 2x side meshes.
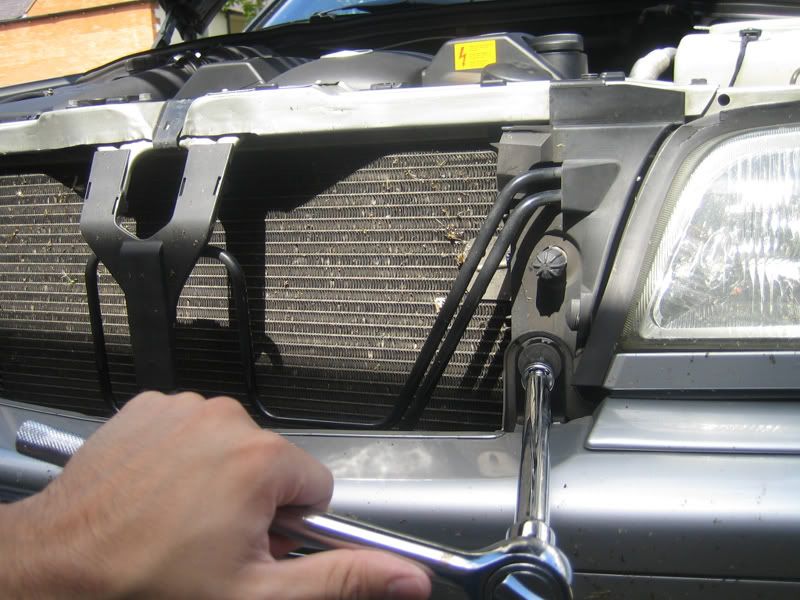
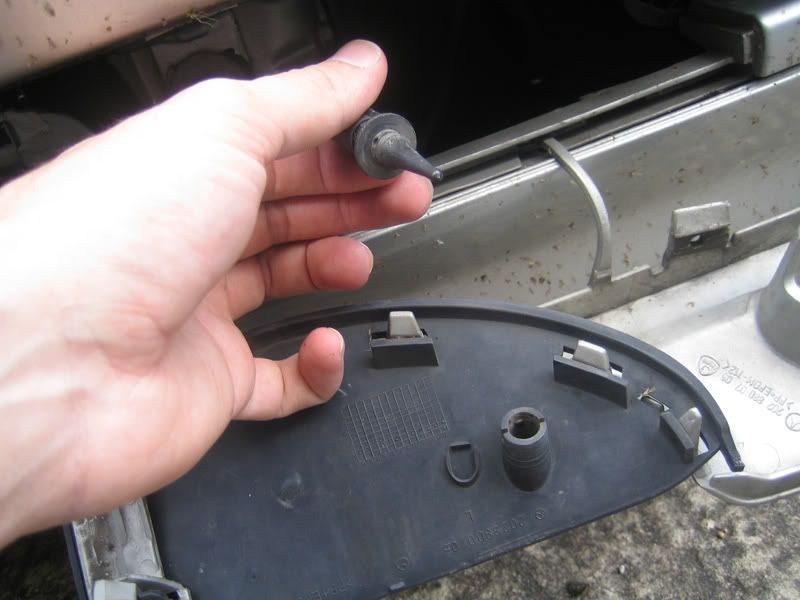
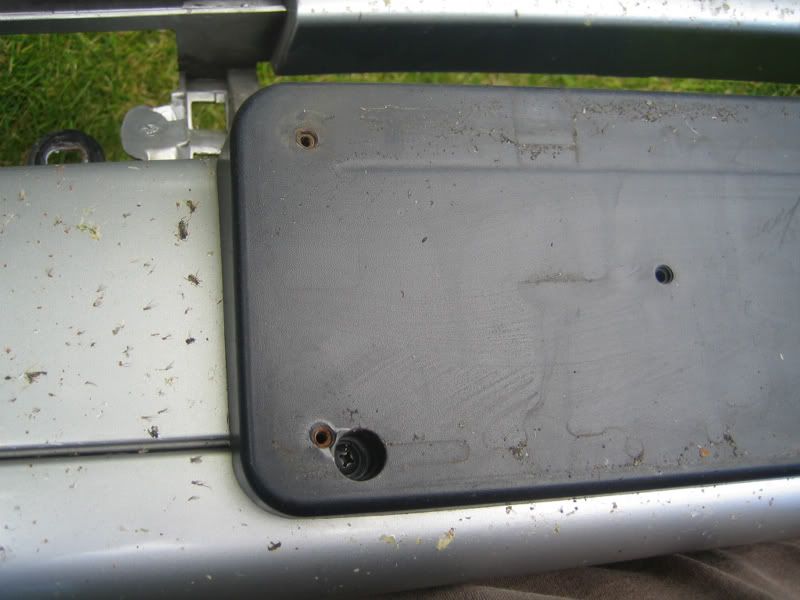
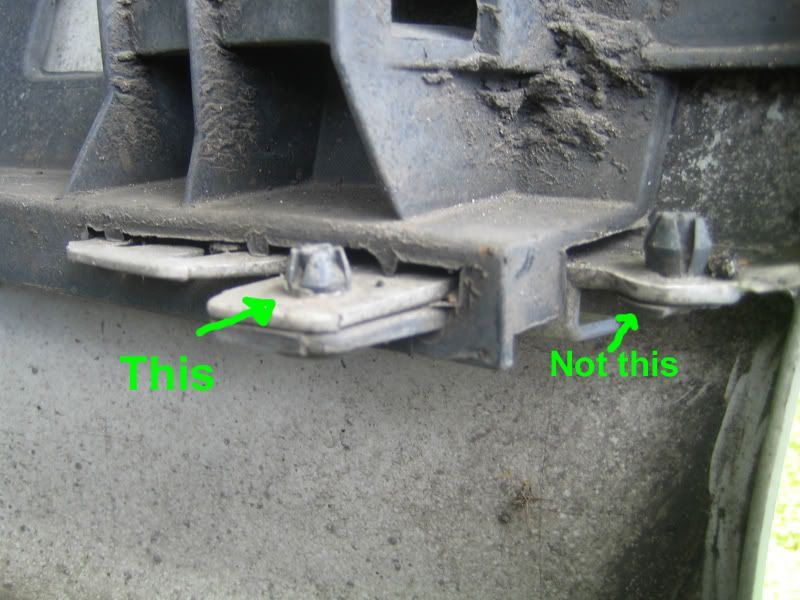
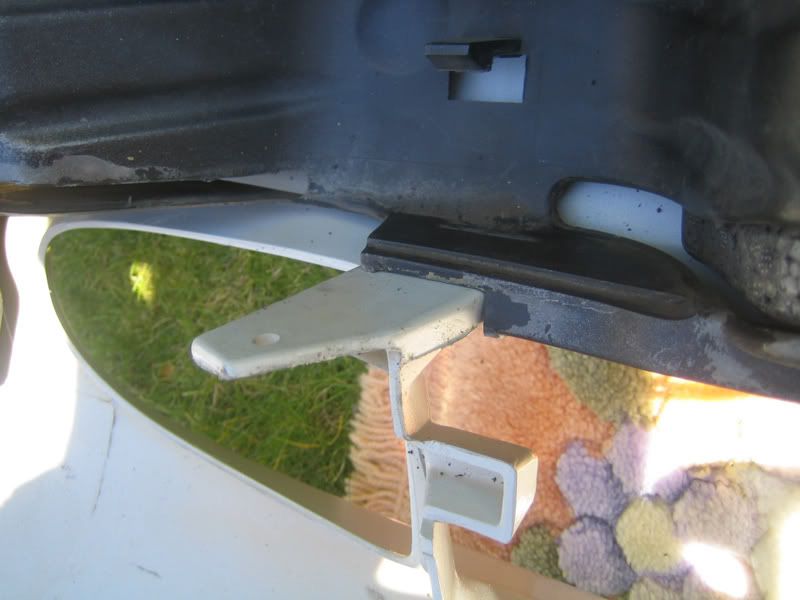
8. The 'Skeleton' should be ready for removal, on each side of the bumper 2 plastic plugs hold it in place. One at the top, the other at the bumper.
Be careful! Make sure you have the correct bottom plugs and not the plugs which hold the 'Lip' of the bumper in place! See picture:
Unclipping them takes strength and time, if done correctly they shouldnt break!
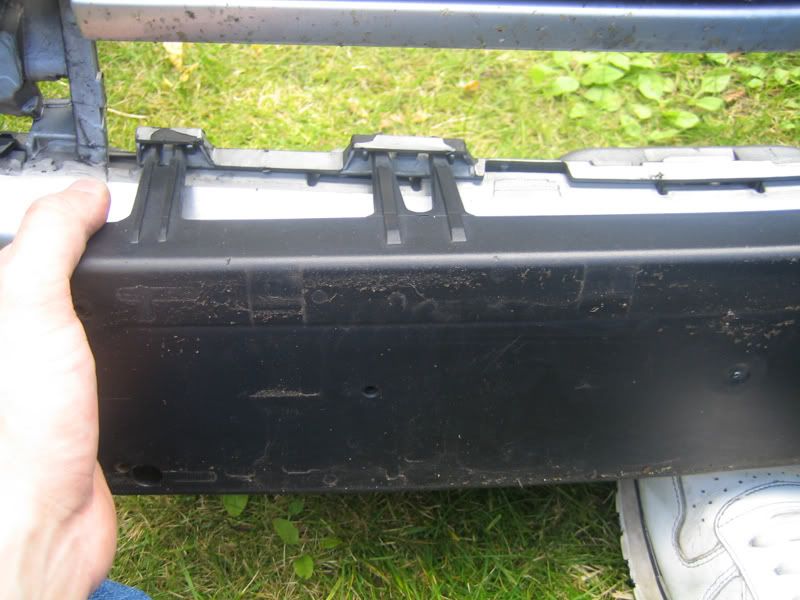
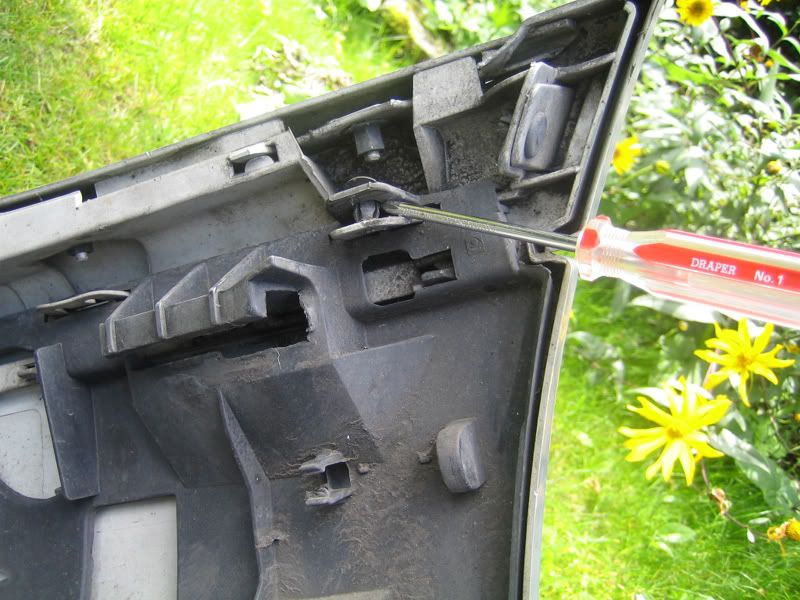
9. With the sides unclipped, they are free of the bumper. You must now make you way across the bumper unclipping the rest of the skeleton:
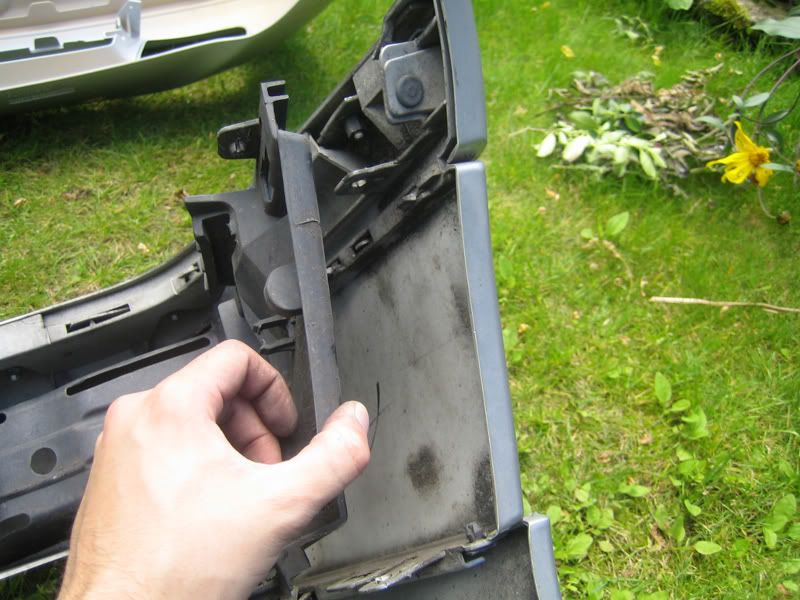
With it free of the old bumper. Re-fit the skeleton back into its new home - The C43 bumper.
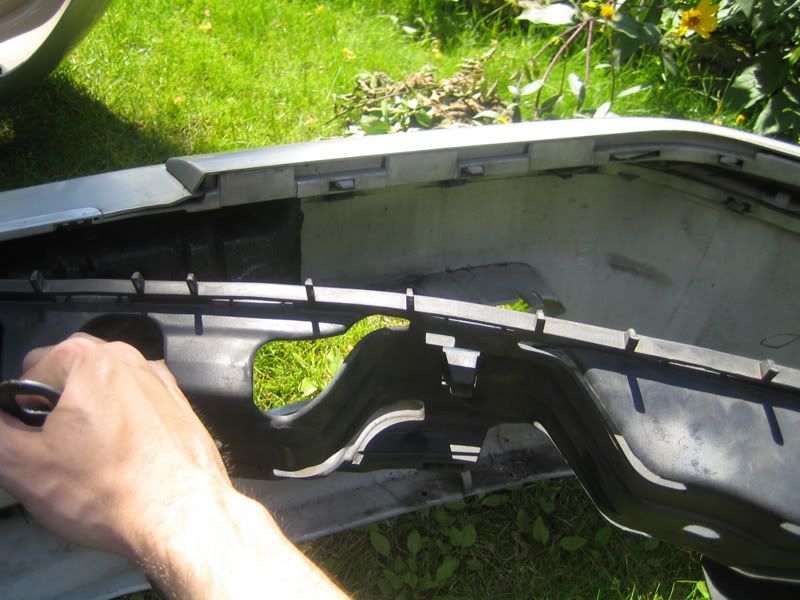
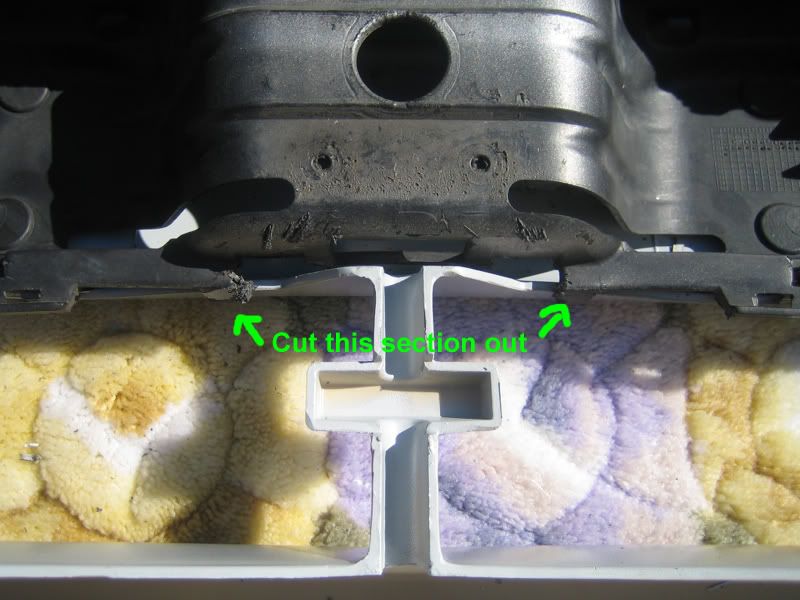
10. This should be straightforward until you try and fit the bottom centre and sides of it.
You will need to saw/file out some small sections of the skeleton in order to have a plush fit See pictures:
With the skeleton fit in place, add the 3x foam inserts into the very top of the bumper. The large one in the centre, the 2 smaller ones ether side. They should fit smuggly.
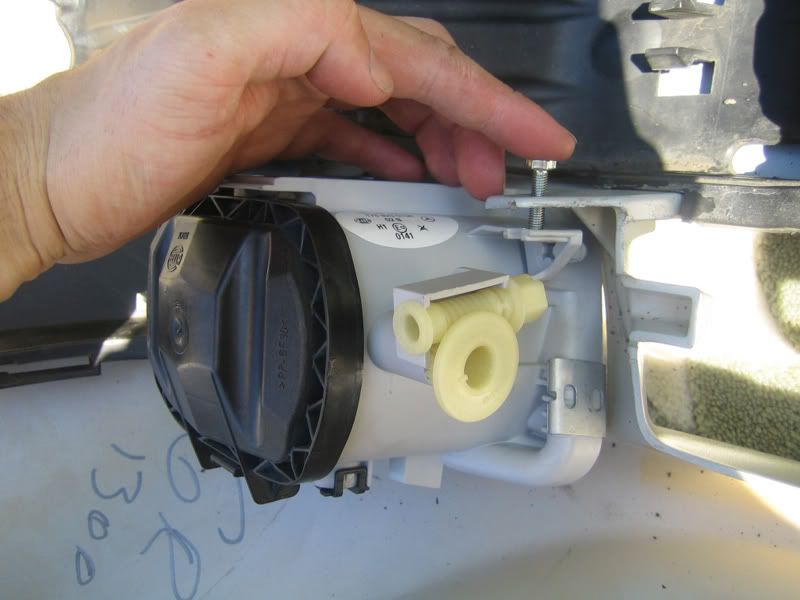
11. Once you happy with the fit, its now time to start on fitting your fog lights to the bumper.
With the screws/washers provided, attach the 1st screw as shown below:
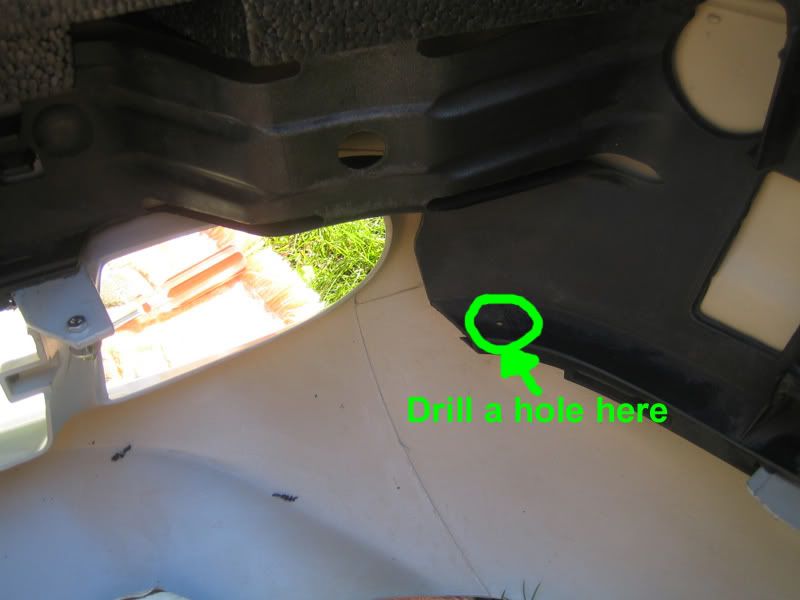
Then with each fog positioned correctly, drill a small hole in each corner of the skeleton for the 2nd screw that will hold the lights correctly in place:
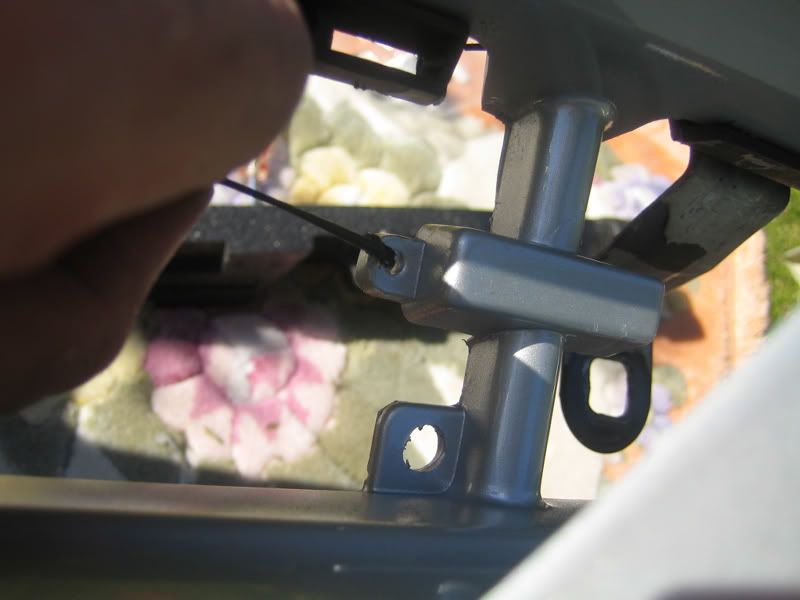
12. With both lights in place, attach the removable centre bar with the 2x plastic cables provided. This bar is removable for access to the towbar eye.
Once attached correctly, press the bar into place until it clicks.
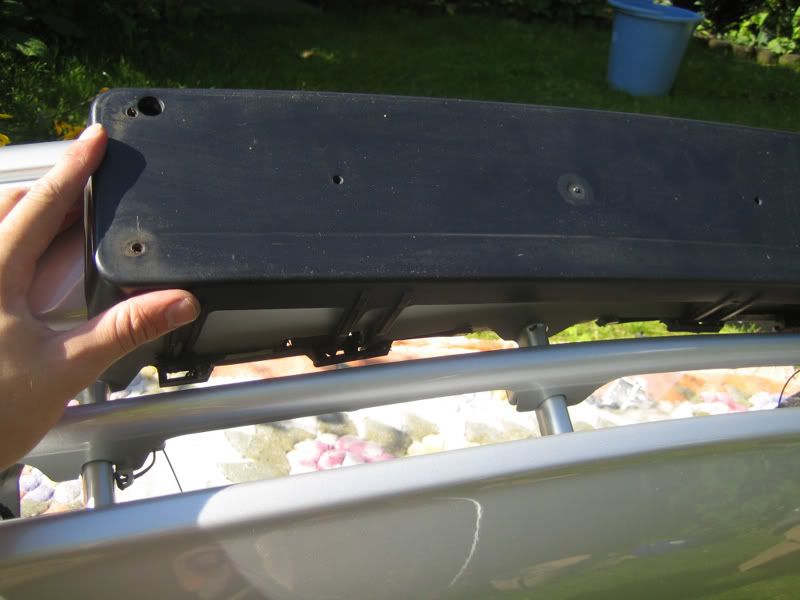
13. Now its time to re-attach the numberplate plinth, line it up correctly and use the drill to make 2x small holes for the screws to hold it in place.
Use tape to mark out where you want the frame as you dont want to get it wrong!
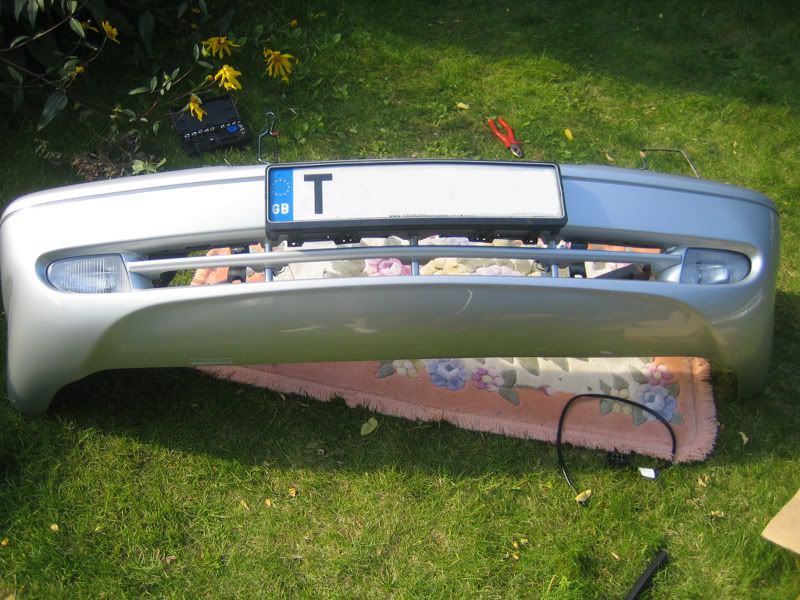
Your new bumper should look like this:
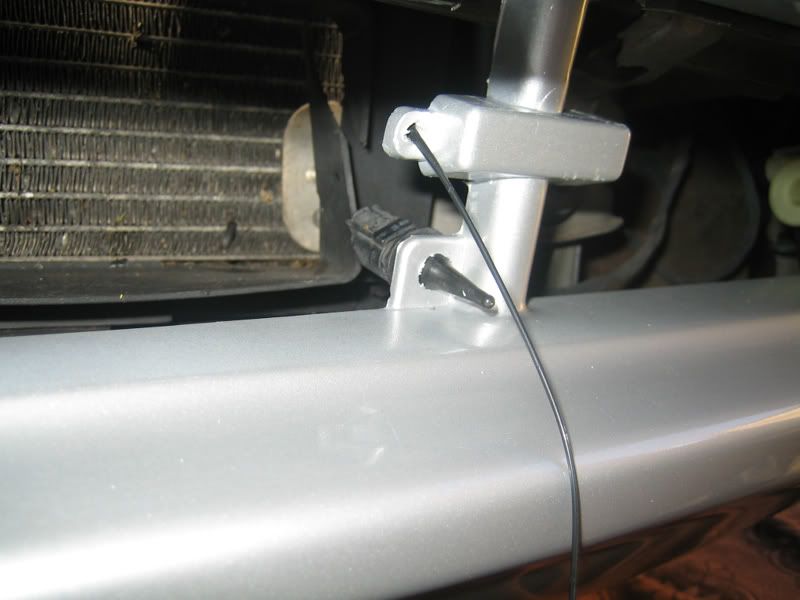
14. Before fitting the bumper back on, connect the 2x cables to both foglights. Shortly we will be connecting them upto the main headlight units.
15. Refitting of the bumper is straightforward, but make sure you lay towels down on the floor & make sure someone can help you fit it back. Otherwise you risk dropping 1 side and scratching your brand new bumper!
With it in place, reconnect the temp sensor into the small hole, it should click back into place.
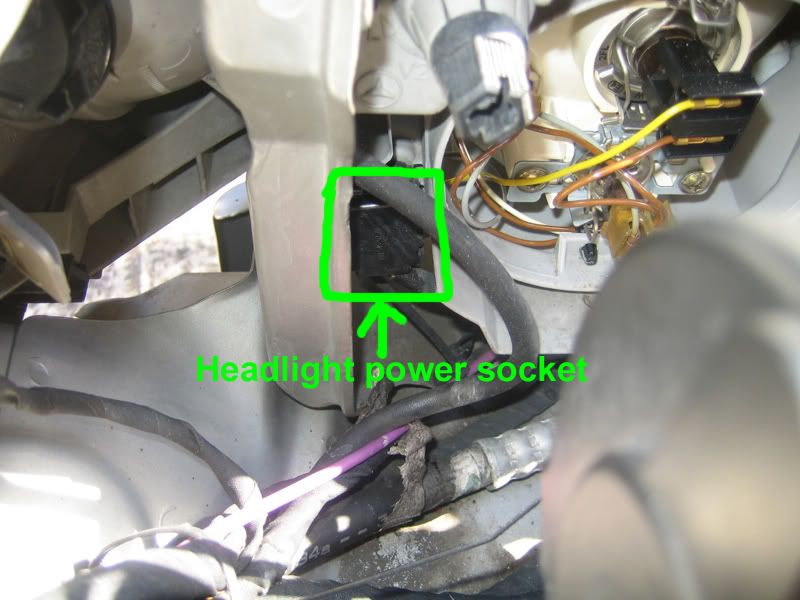
16. Connecting the fogs:
In order to connect power to your new fogs, you will need to access the power plug behind each of the headlights.
In theory, you should be able to reach round and unplug without removing the headlights, I had to remove them! due to the connectors having seized up. Removal of the headlights will be another HOWTO comming soon.
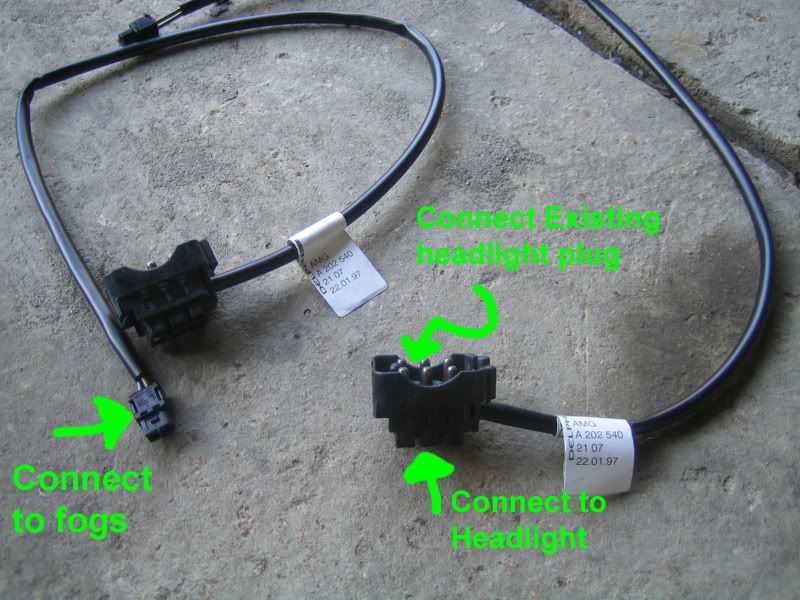
All you need to do is feed the power cable up to the back of the lights, connect them, and fit the existing plug into the back of the new cable.
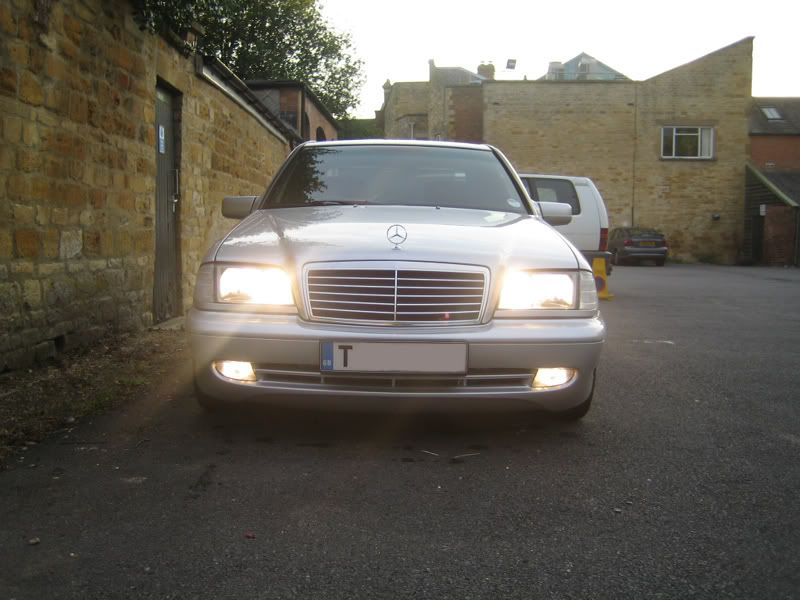
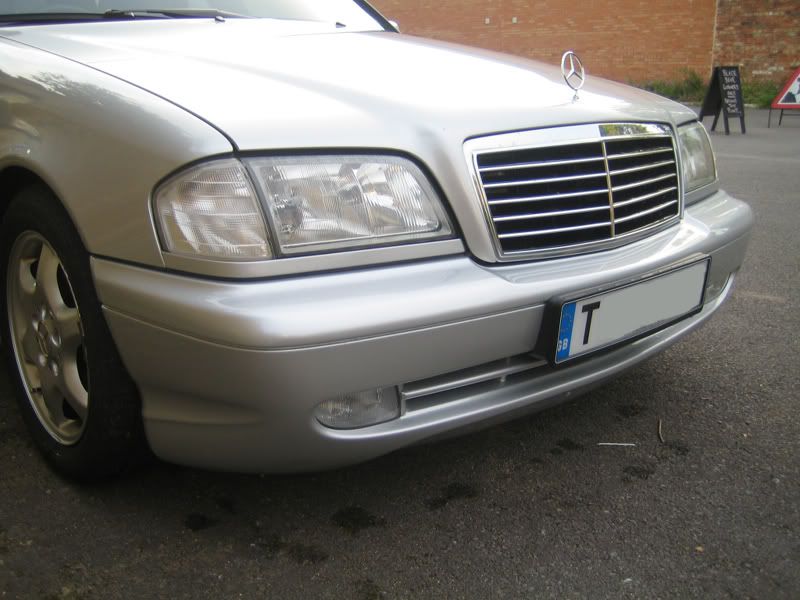
Once its all back together and connected, marvel at your C24 AMG wannabe


 Reply With Quote