

 Reply With Quote
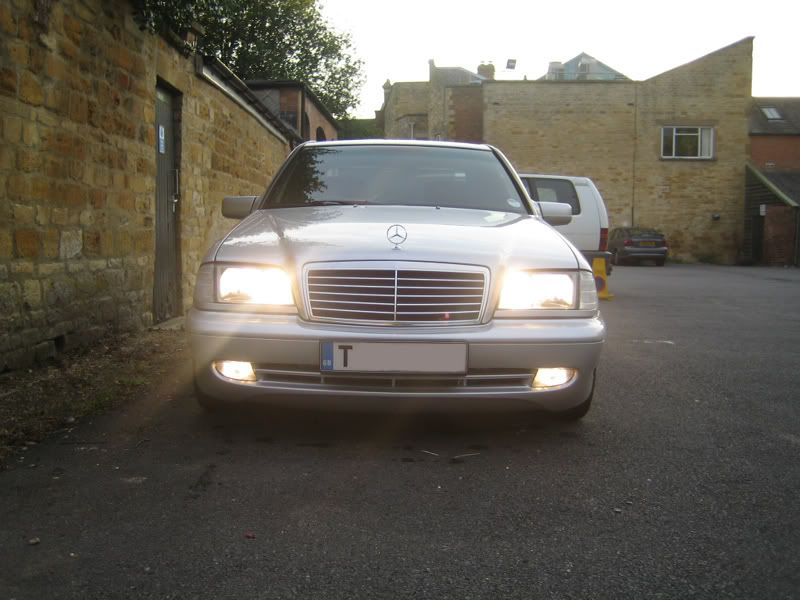
Very nice How-to. That final picture with the foglights looks hot!


HOW TO:
Fit a C43 AMG front bumper skin to a W202
Fit & Connect the front fog lights.
Time taken:
2-3 Hours
Tools required:-13mm Socket, Small Philips screwdriver, Pliers, Electric Drill - another person for fitting it back on. & to make you food/drink as you go on.
Parts required:
C43 Front bumper & Connection kit/parts.
2x Front Foglights
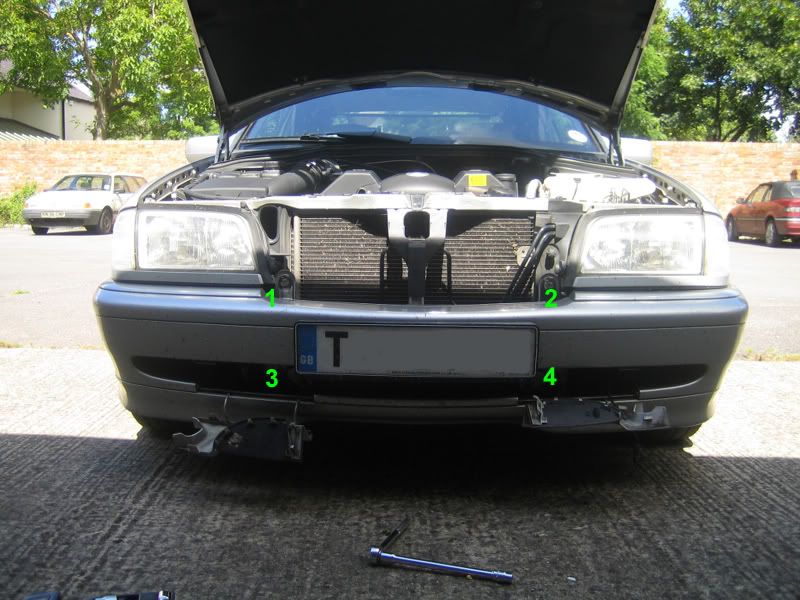
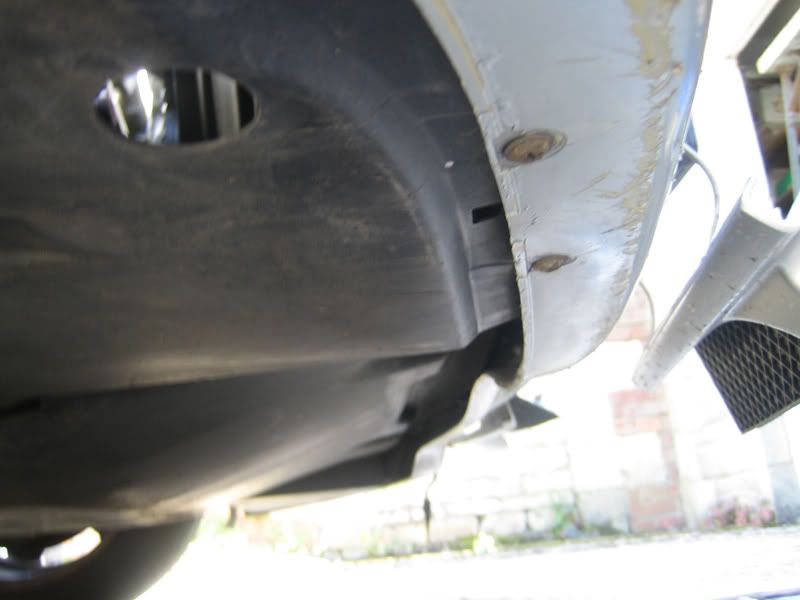
1. Start removing your existing front bumper by unscrewing the 4 main 13mm bolts located as follows:
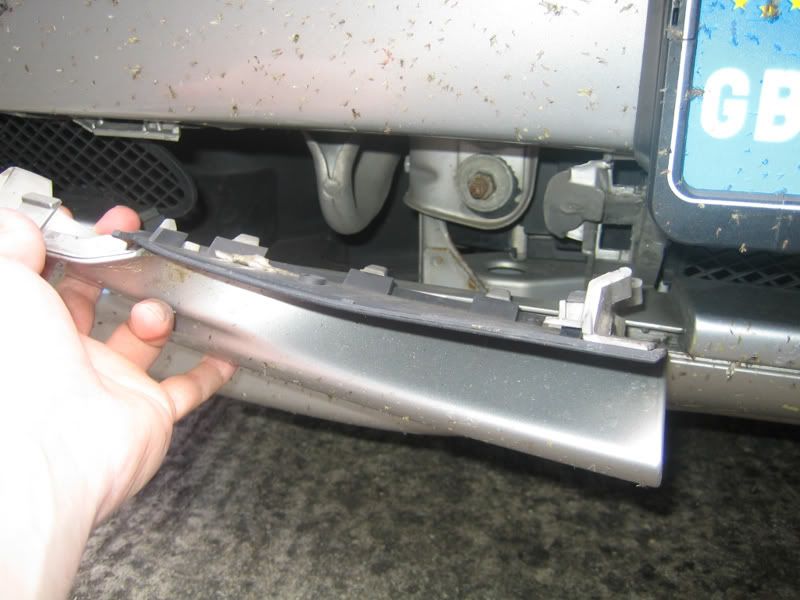
To gain access to the bottom 2, you will need to pull foward the bumper trim to expose the bolts.
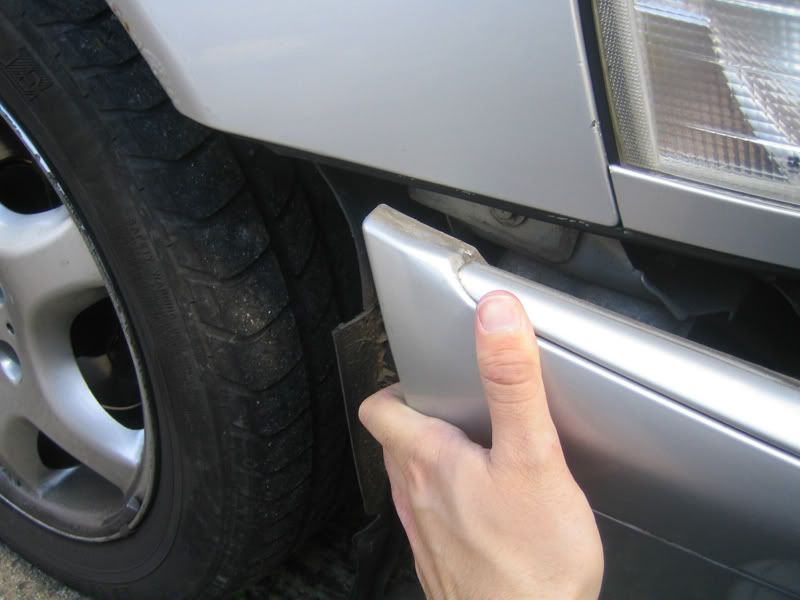
2. With all 4 bolts removed (keep them safe!) and make your way to below the bumper, just infront of each wheel. You will spot 2x screws holding the mud guards in place. All 4 screws need to be removed.
3. Now pull back the mud guards over the bumper as shown below. This will make the removal alot easier.
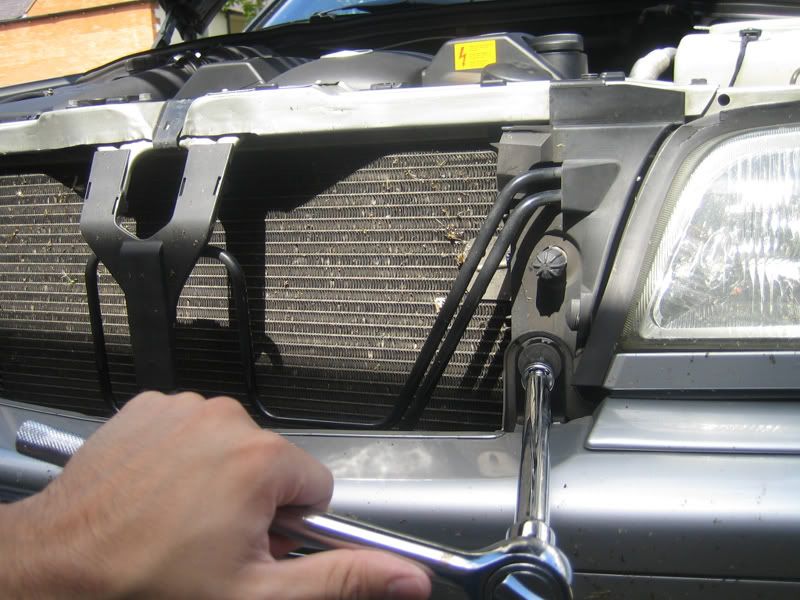
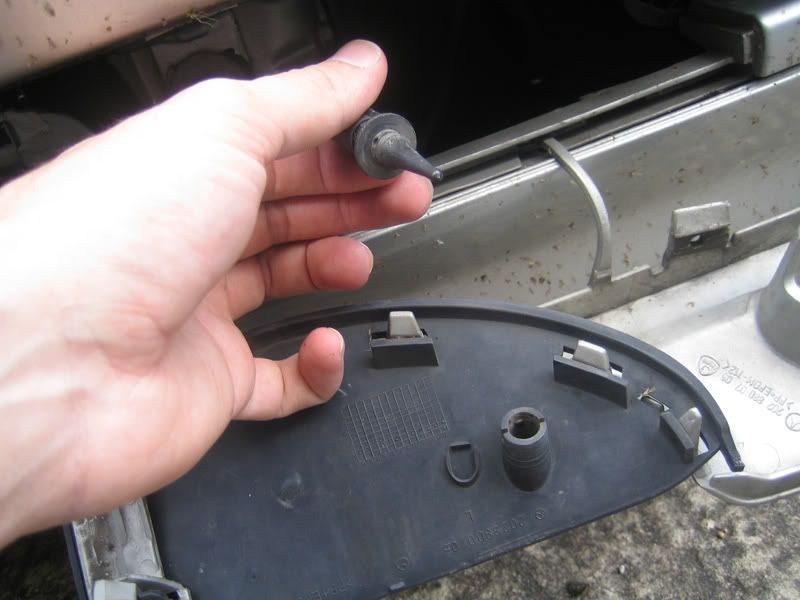
4. Unclip the temp sensor from the front panel, it should just push through with a small amount of force.
5. Your now ready to remove the front bumper, ideally with the help of a friend - start at one corner and pull forwards.
It is normal to hear a loud scraping sound as the bumper is mounted on 'rail's'.
No doubt one side will give you grief so keep tugging until it is free.
Your old bumper is now off, place it down on a soft surface so that the corners arent scratched.
Id take this chance to give the newly exposed bodywork a clean as it will no doubt have 8+ years of dirt & possibly rust now visible.
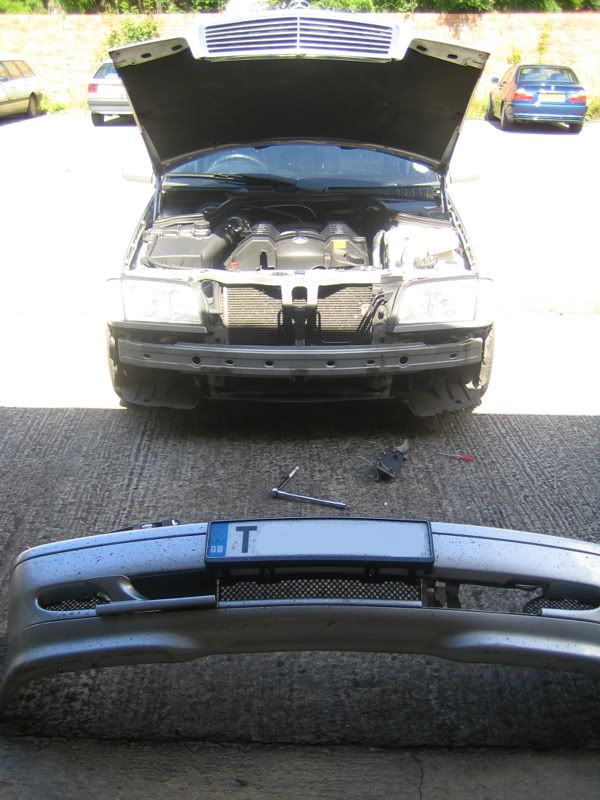
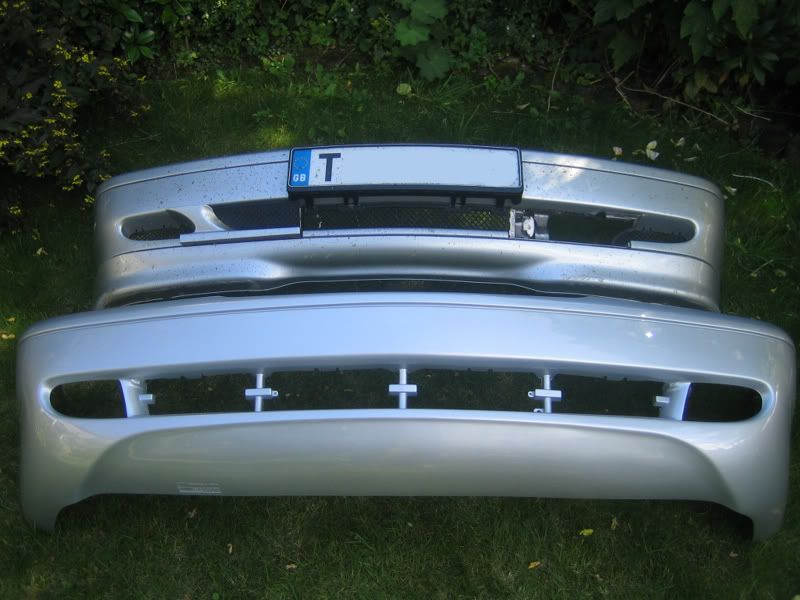
For those who are new to W202s, this is a good shot showning the differences in the standard facelift bumper agaist a C43 AMG bumper.
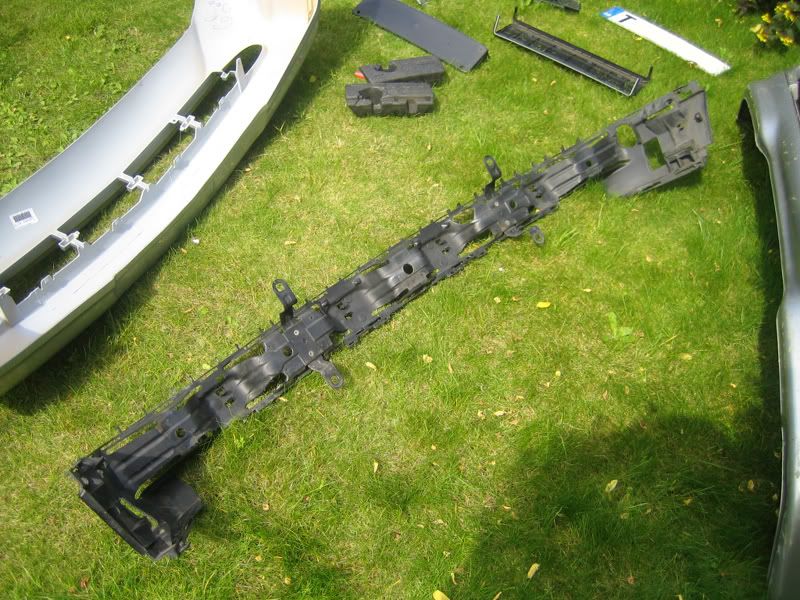
Removing & refitting the Bumper 'skeleton'
6. Now, this is the start of the tricky processes. From now on we are trying to remove the old bumper frame/skeleton from the inside or your old bumper, to do this you should 1st start with removing the numberplate plinth.
It is held on by 2x small screws, 1st remove them & keep them safe.
With the screws removed, you need to unclip the plinth by pulling the 4 clips free of the bumper (see pic) - be careful as its easy to break them!
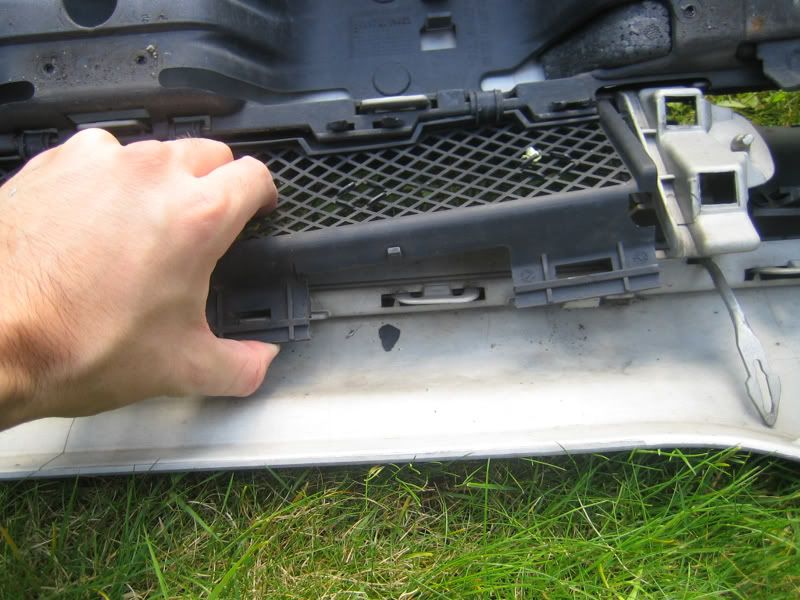
7. You can now start on uncliping the bumper mesh trim, mine is a Sport so I have 3 lots to remove. Elegance models only have the 2x side meshes.
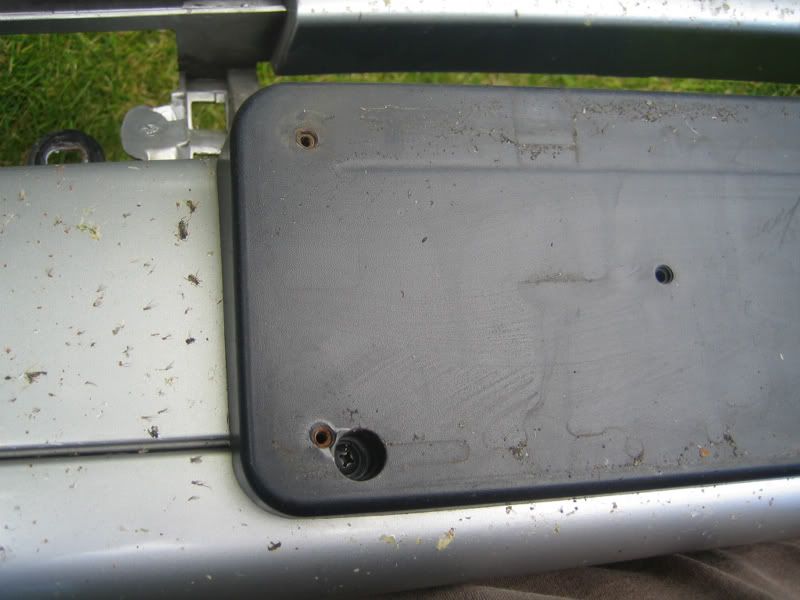
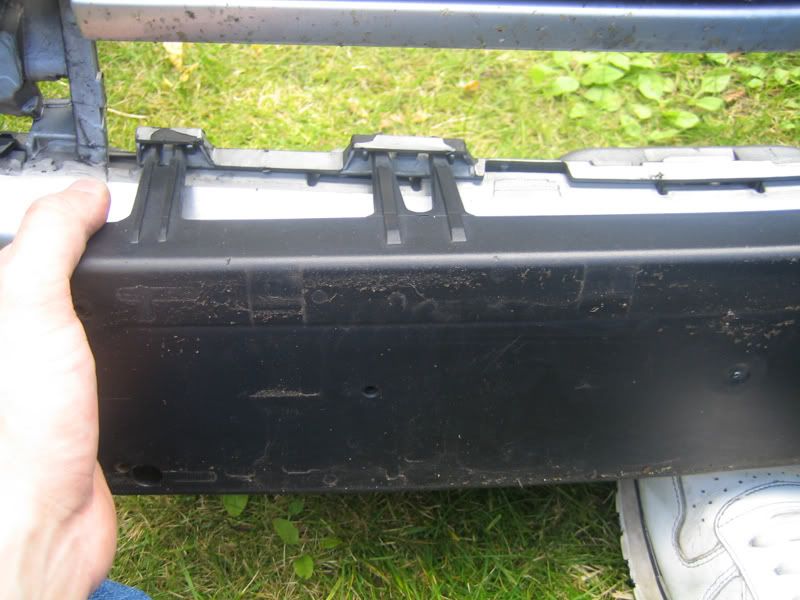
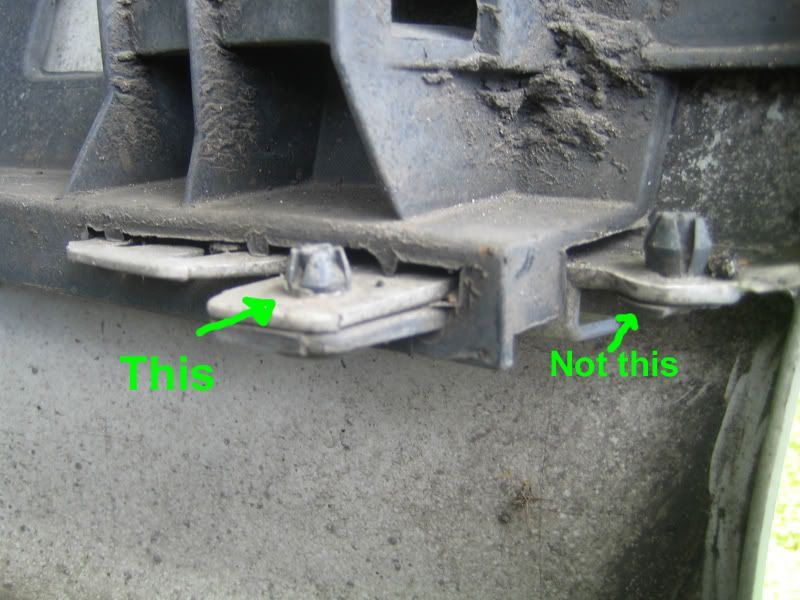
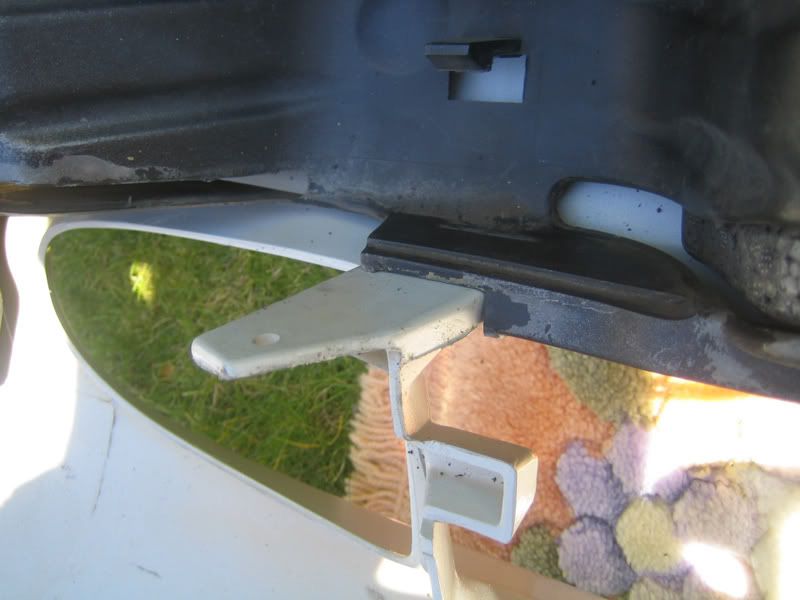
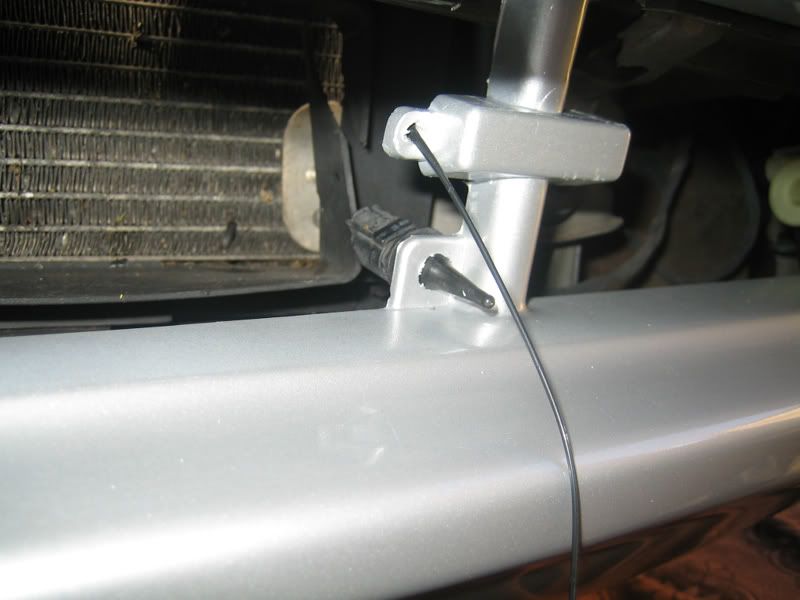
8. The 'Skeleton' should be ready for removal, on each side of the bumper 2 plastic plugs hold it in place. One at the top, the other at the bumper.
Be careful! Make sure you have the correct bottom plugs and not the plugs which hold the 'Lip' of the bumper in place! See picture:
Unclipping them takes strength and time, if done correctly they shouldnt break!
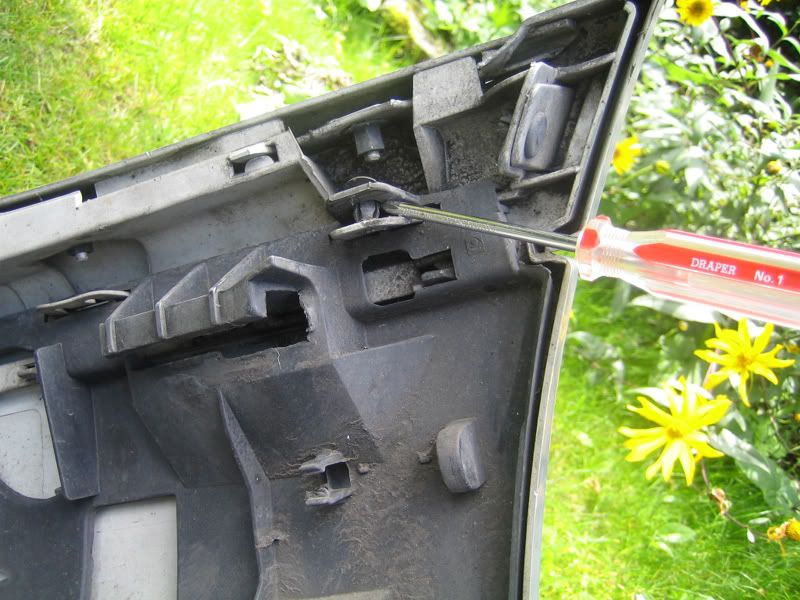
9. With the sides unclipped, they are free of the bumper. You must now make you way across the bumper unclipping the rest of the skeleton:
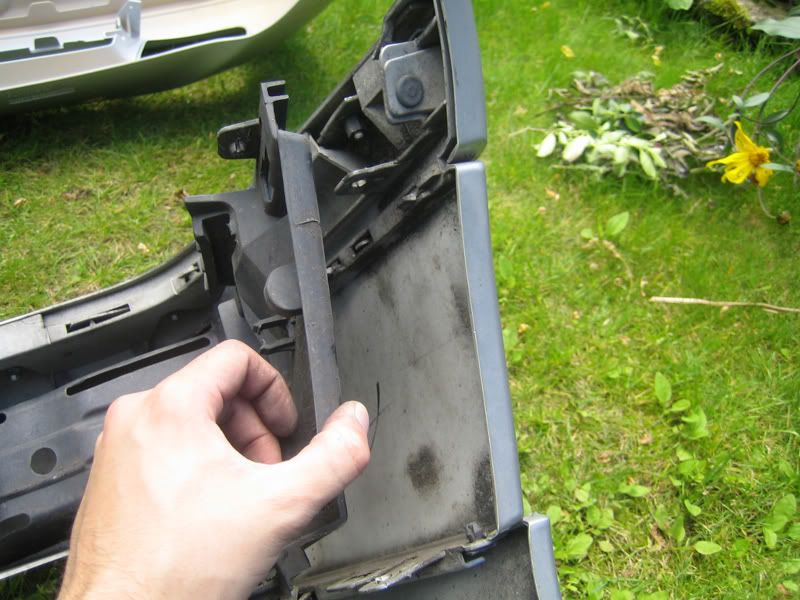
With it free of the old bumper. Re-fit the skeleton back into its new home - The C43 bumper.
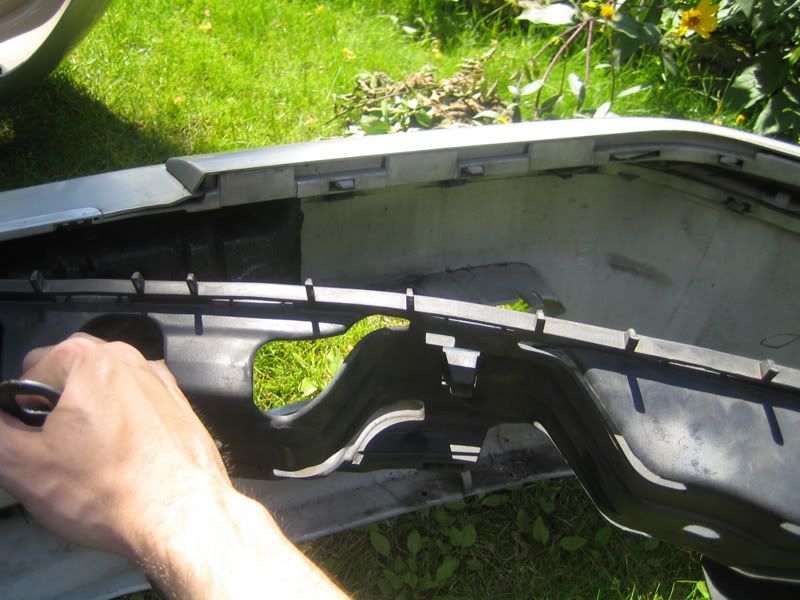
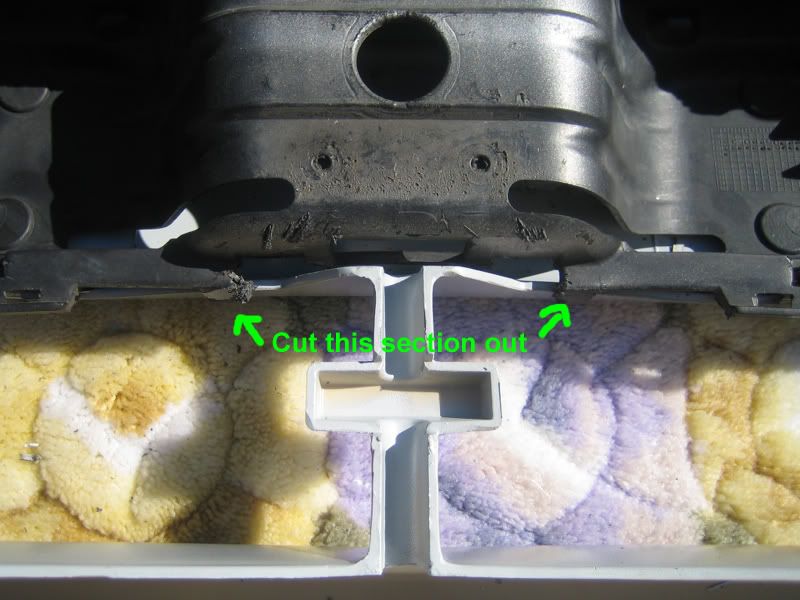
10. This should be straightforward until you try and fit the bottom centre and sides of it.
You will need to saw/file out some small sections of the skeleton in order to have a plush fit See pictures:
With the skeleton fit in place, add the 3x foam inserts into the very top of the bumper. The large one in the centre, the 2 smaller ones ether side. They should fit smuggly.
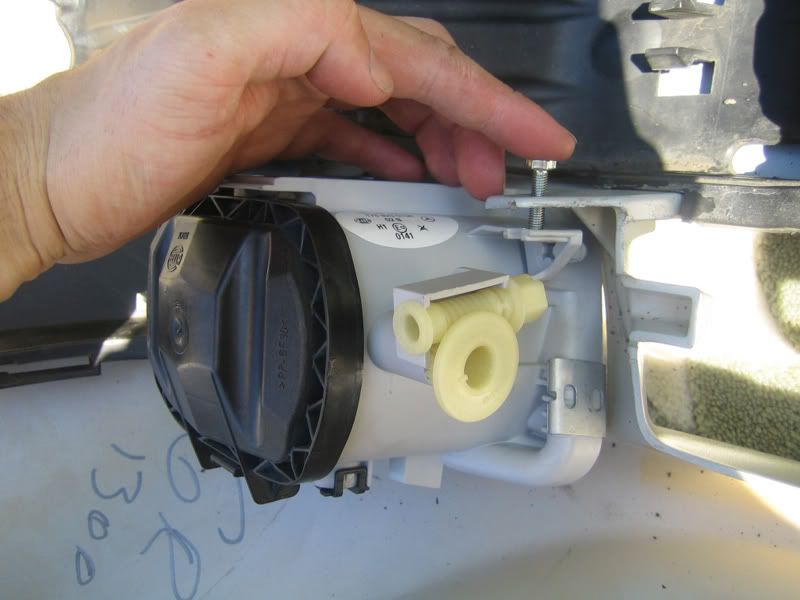
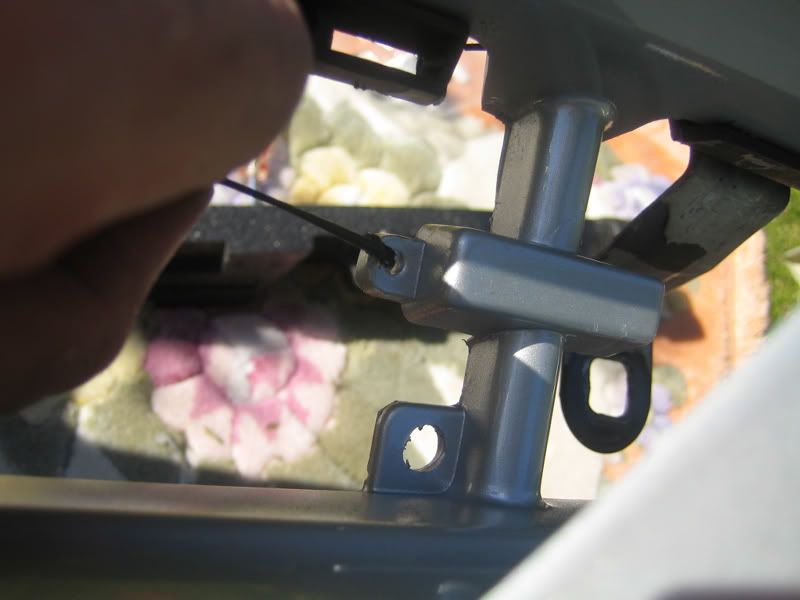
11. Once you happy with the fit, its now time to start on fitting your fog lights to the bumper.
With the screws/washers provided, attach the 1st screw as shown below:
Then with each fog positioned correctly, drill a small hole in each corner of the skeleton for the 2nd screw that will hold the lights correctly in place:
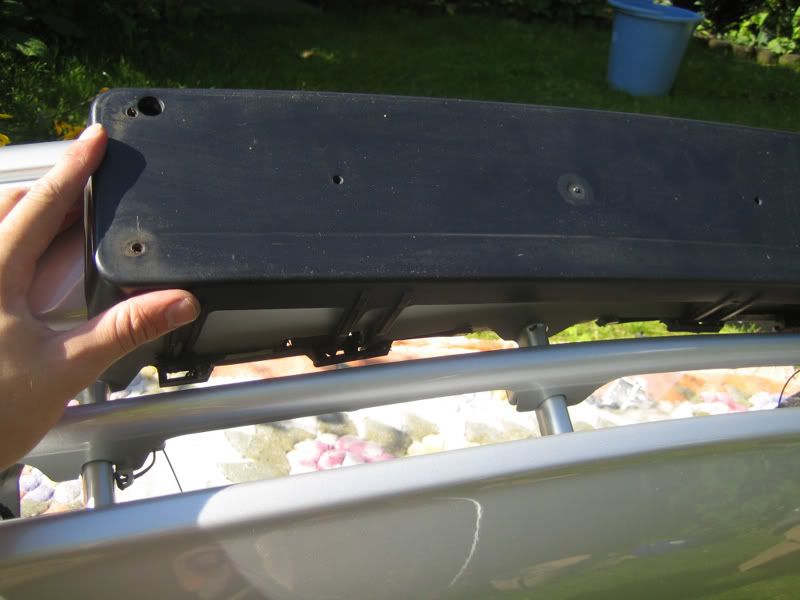
12. With both lights in place, attach the removable centre bar with the 2x plastic cables provided. This bar is removable for access to the towbar eye.
Once attached correctly, press the bar into place until it clicks.
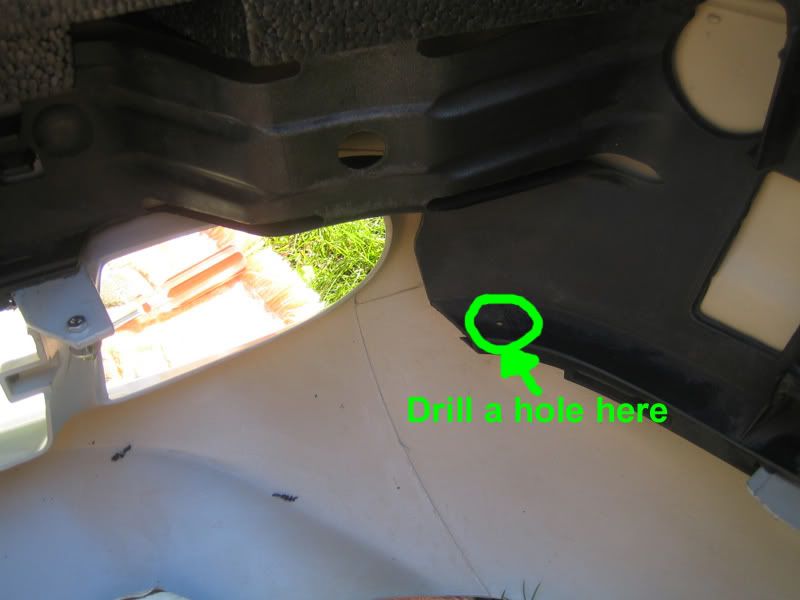
13. Now its time to re-attach the numberplate plinth, line it up correctly and use the drill to make 2x small holes for the screws to hold it in place.
Use tape to mark out where you want the frame as you dont want to get it wrong!
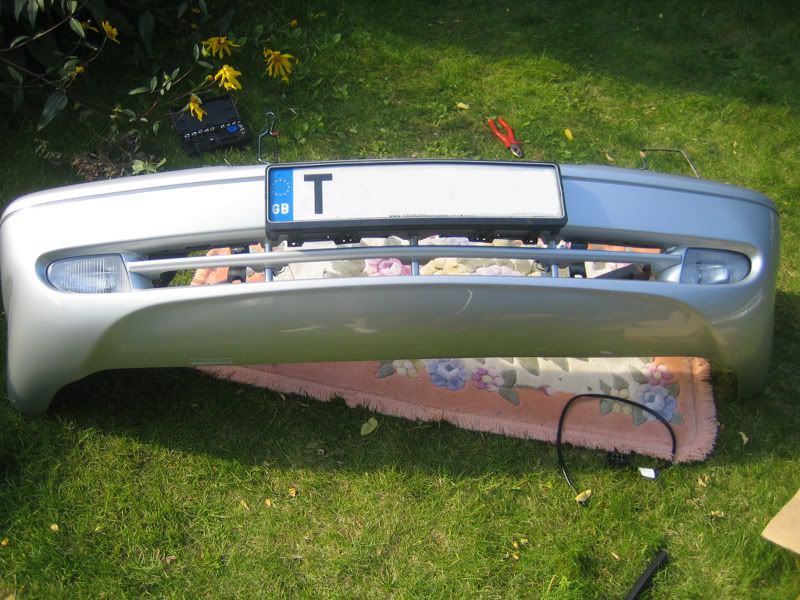
Your new bumper should look like this:
14. Before fitting the bumper back on, connect the 2x cables to both foglights. Shortly we will be connecting them upto the main headlight units.
15. Refitting of the bumper is straightforward, but make sure you lay towels down on the floor & make sure someone can help you fit it back. Otherwise you risk dropping 1 side and scratching your brand new bumper!
With it in place, reconnect the temp sensor into the small hole, it should click back into place.
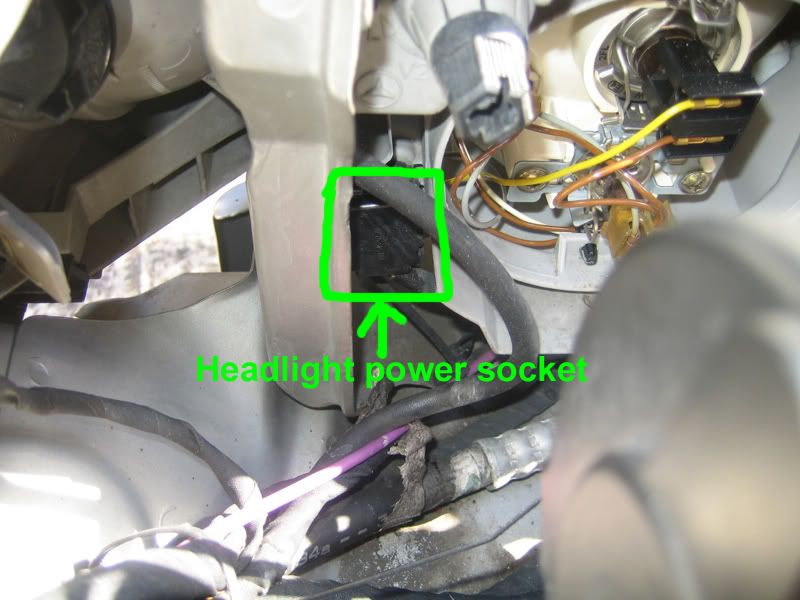
16. Connecting the fogs:
In order to connect power to your new fogs, you will need to access the power plug behind each of the headlights.
In theory, you should be able to reach round and unplug without removing the headlights, I had to remove them! due to the connectors having seized up. Removal of the headlights will be another HOWTO comming soon.
All you need to do is feed the power cable up to the back of the lights, connect them, and fit the existing plug into the back of the new cable.
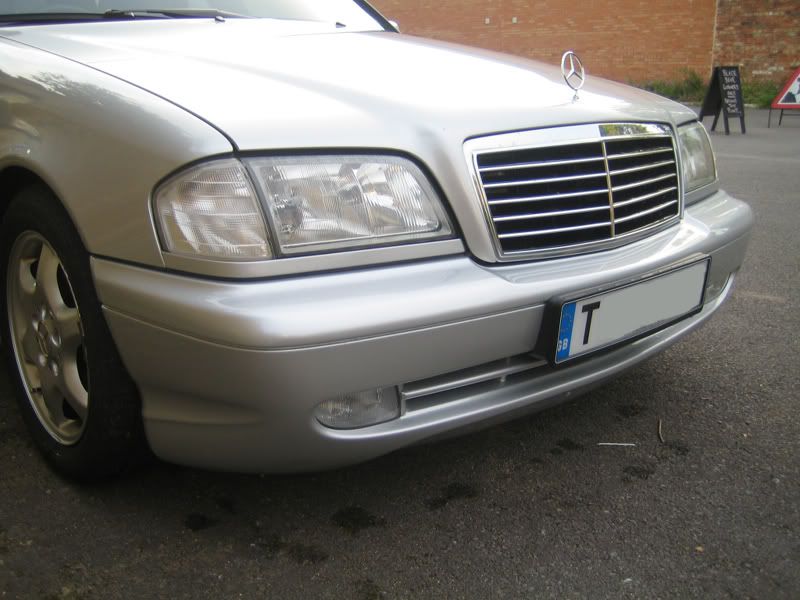
Once its all back together and connected, marvel at your C24 AMG wannabe
Very nice How-to. That final picture with the foglights looks hot!
2012 535i
2005 545i - Retired
1994 C280 - Retired
Now that is a quality how-to. Congratulations on your fine work!
That's one hell of a job!! congrat's and good job...

Great work on the how-to! Just out of curiosity, I didn't see the two fans in front of the radiator. Is that because you do not have air-conditioning?
1999 C230 Kompressor
Yes I have aircon.Originally posted by xvvvz
Great work on the how-to! Just out of curiosity, I didn't see the two fans in front of the radiator. Is that because you do not have air-conditioning?
Later models '99 (mine) and '00 didnt have duel fans for the aircon.
I guess they found a more efficient means to control airflow?
How do the sensors for the airbag work? None are disturbed right?
___________________
2000 C230 kompressor sport, aka C23..
C36 muffler/tips, C43 monoblock staggered wheels, C36 headlight wiper, 35% tint all around.
Nope, the airbag sensors are located on the cars subframe (chassis). You dont even go near them with this mod.
how does this work for a c36 bumper
Very hot! Great write up
1997 Designo Red C36 - SOLD
1999 Mazda Miata Sport
1998 Honda Civic
Bravo! I'm sure this will come in handy in the near future. Hope the pictures are still up by then. Thanks!
will the c43 foglights fit in the c280 bumper, i like the stock foglight look but can find any
thanks BBW will need this information soon when my brabus rear bumper has arrived and everything is ready to be fitted.
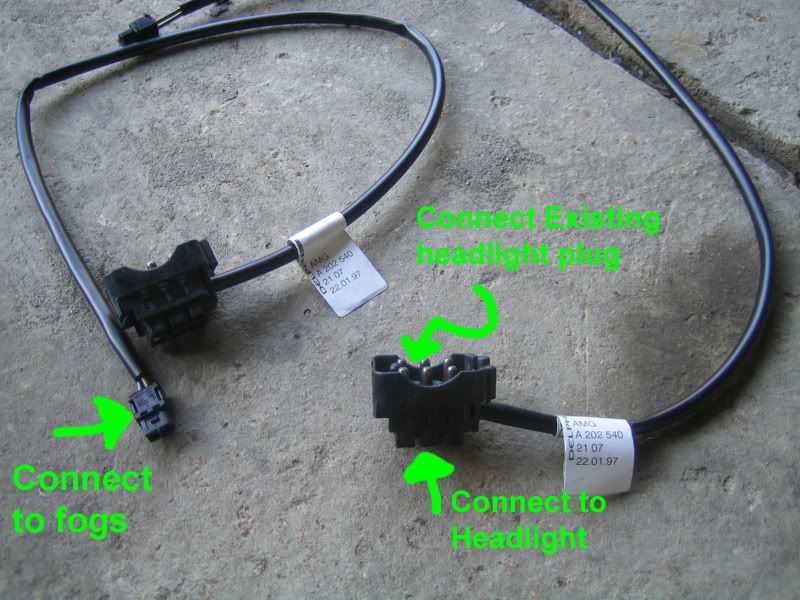
with the fogs and headlight plugs, you have two sets of 6 pin male plugs, where does the fog harness plug into the stock harness?
Those 6 pin sockets have 6 holes (female) on the back of them - see pictures.
So you 'piggyback' the fogs into the system.
Ahh nice! So the part number for that harness is A 202 540 21 07? Thanks.
Yeah, thats correctOriginally posted by DRM
Ahh nice! So the part number for that harness is A 202 540 21 07? Thanks.
this is library project worthy.
Excellent HowTo! Thanks!!
Just one tip regarding Step #8:
Each 'plug' (actually called Rivets) has a plastic post through the center that expands the rivet's 'fingers'. Use a small punch, or even a tiny screwdriver, and push/tap out the post toward the flange of the rivet. Then the remaining portion can be pushed out also without risk of breaking them.Originally posted by BBW
8. The 'Skeleton' should be ready for removal, on each side of the bumper 2 plastic plugs hold it in place. One at the top, the other at the bumper.
Be careful! Make sure you have the correct bottom plugs and not the plugs which hold the 'Lip' of the bumper in place! See picture:
Unclipping them takes strength and time, if done correctly they shouldnt break!
[/B]
If you do, original part # is 114 990 01 92, but has been replaced a few times to currently 001 990 16 92.
1999 C43 AMG Black - sold
- Eagle Eyes: BZ055 Clear Corners with LED 2357A, BZ062 Tails with LEDs; LED lic. lamps
- VVME H7 4300K HID/Xenon Lower Driving & Low Beams (& replaced Halogen Lenses with OEM Xenon Lenses)
- Sylvania SilverStar H1 High Beams
- Silver Star Re-man and improved Trans./Conv.
- Eibach Pro-Kit & Akebono ProACT Ceramic Pads in Front
1999 C280 Sport Black - sold
2005 E55 AMG Black for fun
2007 GL450 Carneol Red for hauling!
Great work! Thank you for the thorough and very well produced tutorial.
Good idea! thanks for the suggestion.Originally posted by Kropf
Excellent HowTo! Thanks!!
Just one tip regarding Step #8:
Each clip has a plastic post through the center that expands the clip's 'fingers'. Use a small punch, or even a tiny screwdriver, and push/tap out the post toward the flange of the clip. Then the remaining clip can be pushed out also without risk of breaking them.
I will be doing the rear bumper 'HOWTO' (C43 AMG) soon
On your step 12, are the plastic cables available for purchase from the dealer? I got the bumper and the center bar brand new from the dealer but did not come with the plastic cables. I wonder if that is sold separately. Thanks.
Zip tie is better...more durable than the factory cable
1999 Silver C43 AMG
Current Mods:
Flathood Emblem * Avantgarde Grill * MB Sport Pedals * 18" AMG Monoblock Aero II * JVC KD-AVX77 * 2 10" Rockford Fosgate P2 Subs * Rockford Fosgate Punch 550.2 * Custom Exhaust * H&R Springs * Clear Corners * Carbon Fiber Wrapped Interior * Debadged
Soon to come:
ECU Tune
Mabuhay!
I got the factory cables. I put a zip tie as well for extra security.
Thanks.
 Posting Permissions